The Freshcaller routing automation feature enables creating automated call flows based on,
- The input provided by a caller (or based on the incoming call).
- An associated processing function (custom action) defined in a serverless custom app and the response obtained from the app.
- Next set of actions defined for the response.
Thereby, routing automations extend the capability of a call flow. For example, using an app, routing automation can verify whether an incoming call is from a VIP number and route the call flow to specific teams.
You can create a serverless app to facilitate routing automation and submit it to the Freshworks Marketplace.
To create such a serverless app,
- Configure functions in the actions.json file.
- Configure callbacks in the server.js file, for the functions.
Based on the routing automation call flow configured in Freshcaller, when a function in actions.json is accessed, the corresponding callback method in server.js is invoked. The app logic in the callback method runs with help of the input passed to the method and returns a response to Freshcaller.
For a demonstration of how to enable call flow automations through an app, see the Handle VIP customers sample app.
Configure Functions (Custom Actions)
When a Freshcaller account admin configures a routing automation call flow, in the configuration window > APP NAME field, all custom apps installed for the account are displayed as a drop-down list. The app that the admin selects is associated with the call flow. In the configuration window > FUNCTION NAME field, the functions defined in the selected custom app are displayed as a drop-down list. The function that the admin selects is associated with the call flow. To configure the functions that are displayed in the FUNCTION NAME field,
- After you create a serverless app, navigate to the app’s root directory and create the actions.json file.
- In actions.json, use the following format to define functions:
1 2 3 4 5 6 7 8 9 10 11 12 13 14 15 16 17 18 19 20 21 22 23 24 25 26 | { "<functionCallbackName>": { "display_name": "<displayed in routing automation interface>", "parameters": { "$schema": "http://json-schema.org/draft-04/schema#", "type": "<a valid data type specific to the JSON schema>", "properties": { "input": { "type": "<a valid data type specific to the JSON schema>" } }, "required": ["input"] }, "response": { "type": "<a valid data type specific to the JSON schema>", "properties": { "<response_variable1>": { "type": "<a valid data type specific to the JSON schema>" } } }, "description": "<message string>" }, "<anotherFunctionCallbackName>": {...}, "<yetAnotherFuntionCallbackName>": {...} } |
The functionCallBackName object contains the function definition. <functionCallBackName> acts as the key that identifies the corresponding callback method defined in server.js. You can define the function by using the following attributes.
| ATTRIBUTE | DATA TYPE | DESCRIPTION |
|---|---|---|
| display_name | string | Function name that is displayed in the routing automation call flow configuration window > FUNCTION NAME drop-down list. If the display_name value is empty, in the configuration window, <functionCallBackName> is displayed as the function name. |
| description | string | Meaningful description that states the purpose of the function. |
| parameters | object | Definition of the attributes that form the input payload to the callback method in server.js. |
| response | object | Definition of the attributes that form the response from the callback method in server.js. response.type specifies the data type in which the response is returned to Freshcaller. |
The FDK enables defining different types of input attributes and fetching their values dynamically, when the configured automations are run. For this, the parameters object should be defined as follows:
Copied Copy1 2 3 4 5 6 7 8 9 10 11 12 13 | "parameters": { "$schema": "http://json-schema.org/draft-04/schema#", "type": "<a valid data type specific to the JSON schema>", "properties": { "<input_attribute1>": { "type": "<a valid data type specific to the JSON schema>" }, "<input_attribute2>": { "type": "<a valid data type specific to the JSON schema>" } }, "required":["<input_attribute1>","<input_attribute2>"] } |
The Freshcaller routing automation currently supports passing only a fixed type of input payload to the app/callback. Therefore, parameters.properties contains only one attribute, input. The parameters object for routing automation is as follows:
Copied Copy1 2 3 4 5 6 7 8 9 10 | "parameters": { "$schema": "http://json-schema.org/draft-04/schema#", "type": "<a valid data type specific to the JSON schema>", "properties": { "input": { "type": "string" } }, "required":["input"] } |
Attributes of the parameters object
| ATTRIBUTE | DATA TYPE | DESCRIPTION | ||
|---|---|---|---|---|
| $schema | string | JSON schema applicable to the input payload. | ||
| type | string | Data type of the input payload. Should be a valid type in the specified JSON schema. | ||
| properties | object |
Attributes that form the input payload. When the admin configures the routing automation call flow, in the configuration window > INPUT TYPE field, the admin can select the type of input payload that is sent to server.js. It is one of the following:
|
||
| required | array of strings |
All mandatory attributes in the input payload. For Freshcaller routing automation, required is always as follows:
|
Sample actions.json Copied Copy
1 2 3 4 5 6 7 8 9 10 11 12 13 14 15 16 17 18 19 20 21 | { "respondOrderStatus" : { "display_name" : "Return order status", "parameters" : { "$schema": "http://json-schema.org/draft-04/schema#", "type": "object", "properties": { "input": { "type": "string" } }, "required": [ "input" ] }, "response": { "type": "string", }, "description": "Return order status of the caller" } } |
Configure Callbacks
When a Freshcaller account admin configures a routing automation call flow, in the configuration window > RESPONSE field, the admin enters all possible responses that can be sent to Freshcaller from the custom app and for each response, in the ACTIONS field, enters the flow the call has to take.
When an incoming call is routed using the routing automation call flow, the function (defined in actions.json) associated with the flow invokes a callback method (defined in server.js). The user-entered input or incoming call’s phone number is passed as the input payload to the callback method. The app logic in the callback method processes the input and sends a response to Freshcaller. Based on the response, the call flow routes the call to an appropriate queue or provides a dynamic message to the caller.
To configure callback methods for the functions configured in actions.json,
- Navigate to the server.js file. In the exports block, define the callback method as follows and place the app logic inside the callback method. Ensure that the callback method name is the same as the functionCallBackName in actions.json. Copied Copy
- In the app logic, to send a response to Freshcaller, use the renderData(error, data) method as follows:
Copied Copy12345678renderData(null, { data: { response: response.body, "app_variables": { "variable1": "<variable value>", "variable2": "<variable value>"} } }); In renderData(error, data), error and data are JSON objects. Ensure that the first argument of renderData(error, data) is always the error object. For success responses, ensure to pass null as the first argument.
error is an object with status and message attributes. For example, to send an error message to Freshcaller, use the renderData() method as follows:
Copied Copy123456exports = { serverMethod: function(options) { var error = { status: 403, message: "Error while processing the request" }; renderData(error); } } data is an object with the following attributes:
- response: Response for which actions can be configured in the routing automation configuration window > ACTIONS.
For example, the following sample code validates a multi-digit input from the caller and returns a response (valid or invalid) to Freshcaller. Copied Copy123456789validateUserMultipleDigits: function (request) { let validVIPNumbers = ["11","12"], response = validVIPNumbers.includes(request.input) ? "valid": "invalid"; return renderData(null, {data: { response, "app_variables": {} }}); } For this response, in the routing automation configuration window, the Freshcaller admin can configure the call flow as follows:

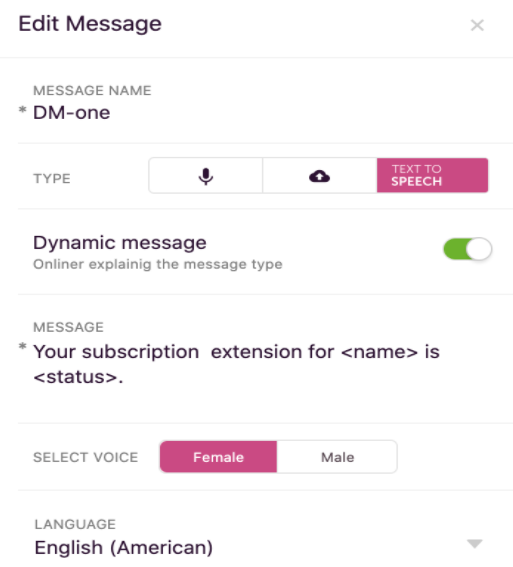
app_variables: Based on the processing of the input payload, the app can return certain values that are used to populate Dynamic Messages in Freshcaller. app_variables contains the <placeholder name>:<value> as key:value pairs. The <placeholder name> in the dynamic message and app_variables should match for the dynamic message to be populated successfully.
For example, the following sample renderData() returns values for the <name> and <status> placeholders.
Copied Copy123renderData(null, {data: { response, "valid": { "name": name[index], status: "in progress"} }}); The returned values can populate the following dynamic message.

To send a response to Freshcaller without any values to populate a dynamic message, specify app_variables as an empty object:
Copied Copy12renderData(null, {data: { response: response.body, "app_variables": {}}});
- response: Response for which actions can be configured in the routing automation configuration window > ACTIONS.
1 2 3 4 5 6 7 8 9 | exports = { <functionCallbackName>: function(args) { //implementation code //if success renderData(null, {data: {response,"app_variables": {}}}); //if error renderData(error); } } |
Sample server.js Copied Copy
1 2 3 4 5 6 7 8 9 10 11 12 13 14 15 16 17 18 19 20 21 | exports = { validateUserPhoneNumber: function (request) { let validVIPNumbers = ["+12105986561", "+12036978361"], response = validVIPNumbers.includes(request.input) ? "valid": "invalid", data = { response, "app_variables": {} }; return renderData(null, { data }); }, validateUserSingleDigit: function (request) { let validVIPNumbers = ["1","2"], response = validVIPNumbers.includes(request.input) ? "valid": "invalid"; // Third party API and response structure return renderData(null, data: { response, "app_variables": {} }}); } }; |
Test
Notes:
1. To test the serverless app, use the latest version of Chrome.
2. Ensure that the JSON files that contain the sample payloads to test custom actions are available at <app's root directory>/server/test_data.
To simulate a custom action and test your app:
- From the command line, navigate to the directory that contains the app related files and run the following command: $ fdk run
- In the address bar of the browser, enter https://localhost:10001/web/test. A dialog box is displayed.

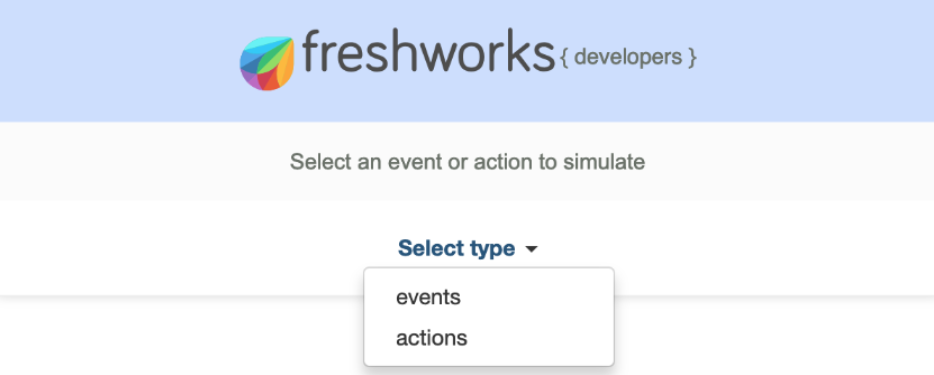
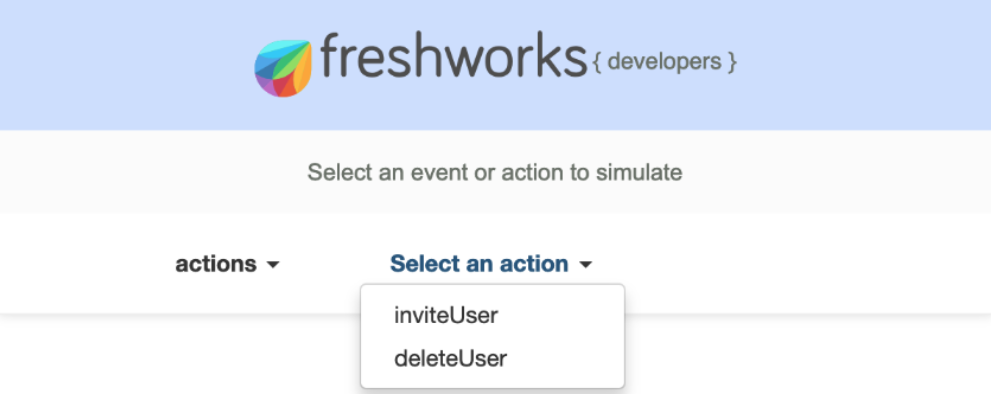
- From the Select type drop-down list, select actions. The Select an action drop-down list is displayed with all custom actions configured in server.js.

Select the custom action you want to simulate. The corresponding payload is displayed. To test a different scenario other than the default, edit the payload.
Click Simulate. If the custom action is successfully simulated, the Simulate button changes to a Success button. If the simulation fails because of invalid payload data, the Simulate button changes to a Failed button. Modify the payload appropriately and click Simulate.